Learn how to integrate tfLink with Model Context Protocol (MCP) to enable seamless file sharing capabilities in AI assistant applications like Claude Desktop and Cherry Studio using simple stdio transport.
What is MCP (Model Context Protocol)?
Model Context Protocol (MCP) is an open standard that enables AI assistants to securely access external data sources and tools. It acts as a bridge between large language models and various services, allowing AI assistants to:
- Access real-time data: Connect to databases, APIs, and file systems
- Execute tools: Perform actions like file uploads, data processing, and more
- Maintain security: Controlled access with proper authentication
- Extend capabilities: Add specialized functionality beyond core AI features
Why tfLink MCP Integration?
AI assistants often need to share files, documents, and generated content with users. With tfLink MCP integration, AI assistants can:
🚀 Automatic File Sharing
Upload files directly from conversations and get instant shareable links
🔒 Secure & Temporary
Files are automatically cleaned up after 7 days, protecting user privacy
⚡ Global CDN
Fast downloads worldwide with Cloudflare acceleration
🔧 Simple Setup
One-time local installation enables file sharing across all conversations
Key Features
- Single Tool: Exposes
upload_file_to_get_temp_share_linkfor seamless file uploads - Local Stdio Transport: Runs entirely on your local machine for security
- Smart Client: Includes filename sanitization, file size limits, and optional authentication
- Simple Configuration: Environment variables with sensible defaults
- Comprehensive Testing: Full Jest test suite and ESLint configuration
Quick Setup
Installation
Install via npx (Recommended)
npx -y temp-file-share-mcp@latestOr install from source
npm install
npm run build
npm run start
Configuration Output
When you run the MCP server, it automatically generates the configuration for your MCP client:
Automatic Configuration Output
temp-file-share-mcp version 0.1.14
temp-file-share-mcp running in stdio mode
Run via: npx -y temp-file-share-mcp@latest
Connect using an MCP client that spawns this command.

Example Cherry Studio config:
{
  "mcpServers": {
    "temp-file-share-mcp": {
      "type": "stdio",
      "name": "temp-file-share-mcp",
      "description": "Upload a local file to tmpfile.link and receive a temporary download URL.",
      "command": "npx",
      "args": [
        "-y",
        "temp-file-share-mcp@latest"
      ],
      "env": {
        "TFLINK_USER_ID": "",
        "TFLINK_AUTH_TOKEN": ""
      }
    }
  }
}
Client Configuration
Cherry Studio Setup
Copy the generated configuration to your Cherry Studio MCP servers settings:
Cherry Studio MCP Configuration
{
  "mcpServers": {
    "temp-file-share-mcp": {
      "type": "stdio",
      "name": "temp-file-share-mcp",
      "description": "Upload a local file to tmpfile.link and receive a temporary download URL.",
      "command": "npx",
      "args": ["-y", "temp-file-share-mcp@latest"],
      "env": {
        "TFLINK_USER_ID": "",
        "TFLINK_AUTH_TOKEN": ""
      }
    }
  }
}
Cherry Studio Configuration Screenshot
Here's how it looks in Cherry Studio:
tfLink MCP server configuration in Cherry Studio interface
Claude Desktop Setup
For Claude Desktop, add this to your claude_desktop_config.json file:
Claude Desktop Configuration
{
  "mcpServers": {
    "temp-file-share-mcp": {
      "name": "temp-file-share-mcp",
      "description": "Upload a local file to tmpfile.link and receive a temporary download URL.",
      "command": "npx",
      "args": ["-y", "temp-file-share-mcp@latest"],
      "env": {
        "TFLINK_USER_ID": "",
        "TFLINK_AUTH_TOKEN": ""
      }
    }
  }
}
Usage Examples
Once configured, you can use simple prompts to upload and share files:
Example Prompts
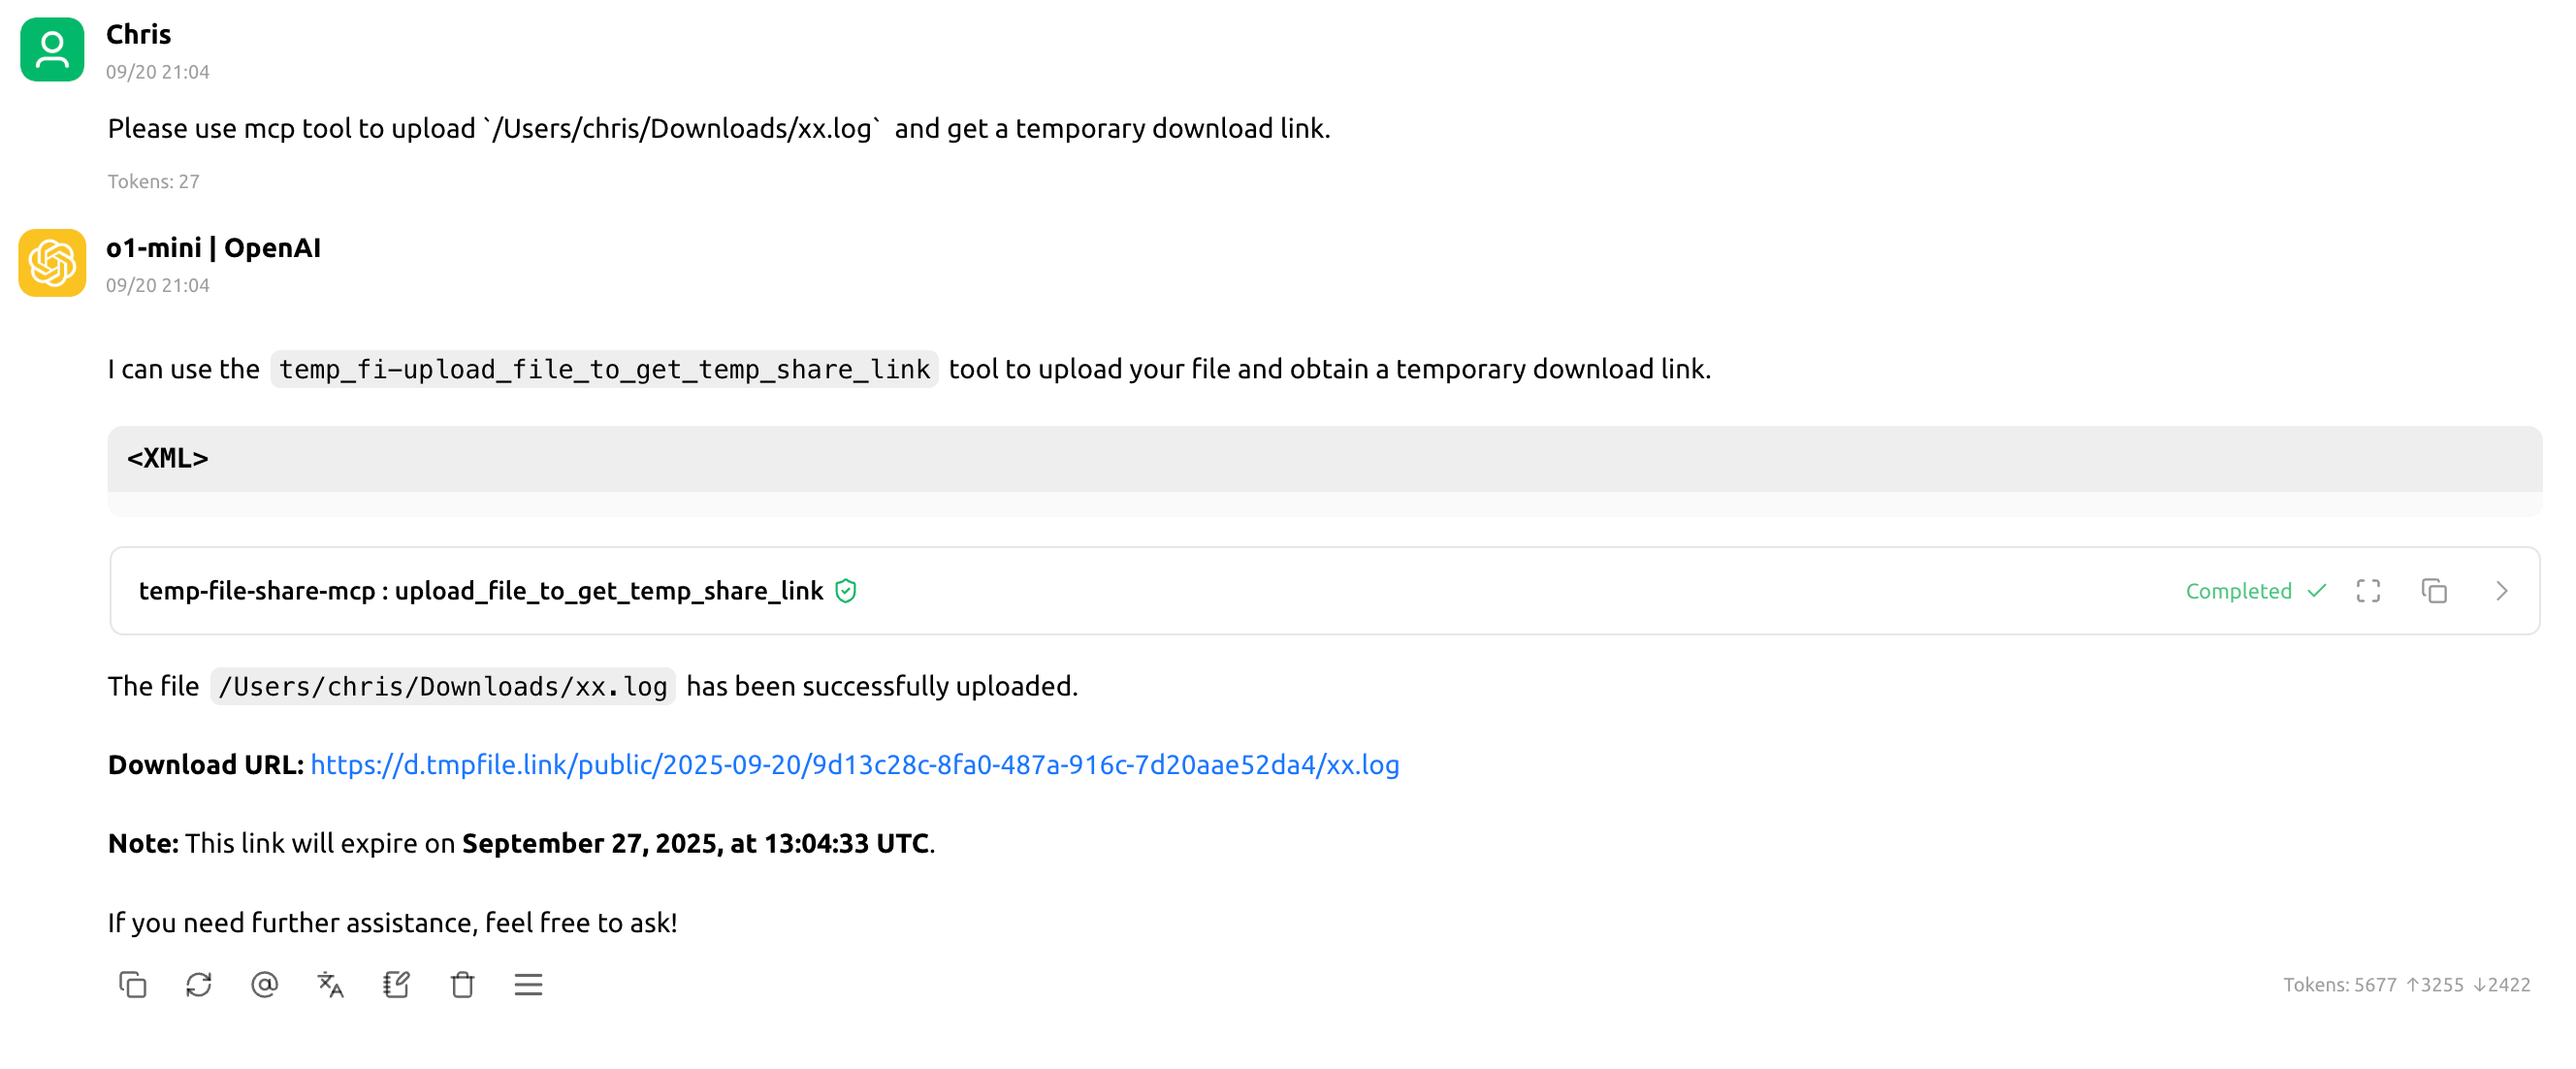
Upload and Share File
# Upload a local file
"Please use mcp tool to upload `/Users/chris/Downloads/xx.log` and get a temporary download link."

# Upload multiple files
"Upload these files using the MCP tool:
- /home/user/report.docx
- /home/user/presentation.pptx"

# Upload with absolute path
"Upload /tmp/data.json using the MCP upload tool and share the link"
Response Example
After uploading, you'll get both structured metadata and a plain-text response:
Upload Response
✅ File uploaded successfully!

📁 Filename: my log 日志.log
📏 Size: 2.4 MB
🔗 Download Link: https://d.tmpfile.link/public/2025-09-20/uuid-here/my log 日志.log
🔗 Encoded Link: https://d.tmpfile.link/public/2025-09-20/uuid-here/my%20log%20%E6%97%A5%E5%BF%97.log
⏰ Expires: September 27, 2025 (7 days)

You can share this link with anyone. The file will be automatically deleted after 7 days for privacy.
Environment Configuration
Customize the MCP server behavior with these environment variables:
| Variable | Purpose | Default |
|---|---|---|
TFLINK_BASE_URL |
Override tfLink endpoint | https://tmpfile.link |
TFLINK_MAX_FILE_SIZE_MB |
Maximum upload size guardrail | 100 |
TFLINK_USER_ID |
Optional authentication for longer retention | - |
TFLINK_AUTH_TOKEN |
Optional authentication token | - |
Authenticated Uploads
For longer retention and better organization, configure authenticated uploads:
Environment Variables Setup
# Set in your shell or MCP client env block
export TFLINK_USER_ID="your-user-id"
export TFLINK_AUTH_TOKEN="your-auth-token"

# Files uploaded with authentication are stored longer
# and organized under your user account
Development
For developers who want to contribute or customize the MCP server:
Development Commands
# Lint the code
npm run lint

# Run tests
npm test

# Build TypeScript
npm run build
Testing Notes
The project includes comprehensive Jest tests covering:
- Configuration validation: Environment variable handling and defaults
- tfLink client: File upload logic and error handling
- MCP tool wiring: Request/response format validation
Note: Live tfLink integration tests are intentionally excluded to avoid credential leakage.
Security & Privacy
tfLink MCP integration is designed with security and privacy in mind:
- Local Processing: MCP server runs entirely on your local machine
- Stdio Transport: No network exposure, communicates via standard input/output
- Automatic Cleanup: Anonymous uploads are deleted after 7 days
- No Account Required: Works without registration for basic usage
- Secure Transmission: All uploads use HTTPS encryption
- Filename Sanitization: Automatic file name cleaning for security
Troubleshooting
Common Issues
MCP server not starting
Ensure Node.js is installed and run npx -y temp-file-share-mcp@latest directly to see error messages.
File too large error
Check the TFLINK_MAX_FILE_SIZE_MB setting and ensure your file is within limits (default: 100MB).
Upload timeout
Large files may take time to upload. Check your internet connection and file size.
Path not found
Ensure you're using absolute file paths when referencing files in MCP tool requests.
Getting Help
Need assistance with tfLink MCP integration?
- 📦 npm Package: https://www.npmjs.com/package/temp-file-share-mcp
- 🏠 Official Homepage: https://tmpfile.link/temp-file-share-mcp
- 🐙 GitHub Repository: https://github.com/tflink-tmpfile/temp-file-share-mcp
- 📖 Documentation: Full API documentation and examples
- 💬 Support: Community support via GitHub issues
Ready to Get Started?
Install the tfLink MCP server and start sharing files with AI assistants!